Tag: art walls

  • Artsy Dwelling: 7 Unique Ways to Hang Artwork

    Artsy Dwelling: 7 Unique Ways to Hang Artwork

    Look beyond the nail and picture hanger.  There are so many unique ways to hang artwork, whether you’re hanging just one piece or grouping lots of work together.  Here are a few of my favorite methods!

    1 |  String it up

    String collage

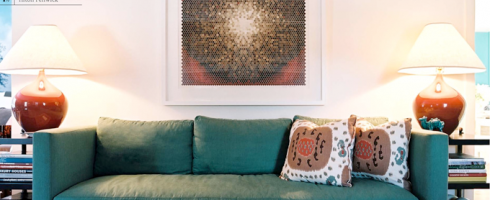
    found here here here here and here

    Create a bit of interest and drama by hanging your artwork by a thread, ‘er string.  It’s a great way to add a bit more height to a piece that isn’t quite tall enough for your wall or to add just the right boho vibe.

    2 | Clip it!

    Clip collage

     found here here here and here

    Clip art takes on a whole new meaning!  Use specialty art clips, gator clips, vintage pant hangers or even just an old fashioned clipboard to display work that isn’t terribly precious.  ( Stay away from clips that might crimp for artwork you don’t want to damage ).

    3 | Create a hanging structure

    Create structure collage

     found here here and here

    Artwork stands out– literally– when you hang it from a three dimensional grid.  The grids add just the right amount of visual texture, creating an interesting juxtaposition and the added bonus of easily switched out work.

    4 | Use the structure you have!

    Structure You Have collageAD_Structure3

    found herhere and here 

    Maybe you’re lucky enough to have some fabulous architectural details already built into your home!  Consider using those structures as a hanging surface for art– that’s what those vintage picture rails were for to begin with!  I’m personally in love with the industrial vibe of the barn-door hanging above!

    5 | Frame within a frame

    AD_Frame in a Frame

    found here

    Another way to add a some healthy dimension to your space?  Find a giant frame and group smaller works of art inside.

    6 | Art mobile!

    Art mobile collagefound here

    Perhaps the most fun of all the options– create an art mobile!  These tiny clips are perfect for displaying artful photos, sketches, postcards, etc.  You know when you’ve bought a little notecard of an artist’s work, knowing there’s no way on earth you could ever afford an original?  Here’s the perfect way to display those treasures!

    7 | Go old school.  Use thumbtacks.

    House of Honey

    found here

    The ol’ thumbtack method was probably the very first way anyone hung your artwork.  Or maybe your mom used refrigerator magnets instead.  Raw, unstretched canvas pinned up in the corners with brass tacks looks absolutely divine in this nursery, doesn’t it?

    Have a unique art hanging method you’d like to share?  Let us know in the comments below!

    All image sources linked above.

  • Artsy Dwelling: Watercolored Walls

    Artsy Dwelling: Watercolored Walls

    A Different Take on the Art Wall

    Gallery walls have been all the rage for a couple of years now.  They are a fantastic way to showcase your art collection and so easy to change up!  But sometimes, you want your art wall to make a bolder statement– why not make the wall itself the artsy focal point?  Whether you paint your masterpiece directly on the wall’s surface, apply an artsy wallpaper, or a mural sized decal, there will be no shortage of artsiness on those walls!  Here are just a few of my own faves from around the web–

    AD_pink palms

    via 

    AD_blue watercolor

    via

    AD_multiwatercolor

    via

    AD_pink geom

    via

    Think I love the simplicity of the pink geometric design and the blue watercolor best.  What do you think?  Have you ever treated your walls as a truly blank canvas?

    PS– Need help finding art for your walls?  Check out the new services I’m offering!  Click on Forager For Hire in the tool bar for more info!

    All image sources linked below the photos.

  • Artsy Dwelling: Walls O’ Art

    Artsy Dwelling: Walls O’ Art

    So you have amassed a little art collection for yourself, huh?  Well done, you!  But maybe you’re stuck on how to display your finds..  Creating “art walls” in your space will allow you to stylishly show off your favorites.

    via Pinterest via Raines Design via olofjakobina.blogspot.com

    One of my favorite things about art walls also known as hanging art “salon style” is how flexible the arrangement is.  It’s a gathering of artwork you love, so there are no set rules.  As in the graphic arrangement above, you can group artwork with like elements.  Above, the simple, black graphics are the unifying factor.

    Or, use frames in all the same color to unify your favorites.  All white or black frames ( or gold, silver, wood, whatever! ) will create an instantly well-designed, intentional feel to your collection.

    via From The Right Bank
    via Pinterest via herwhitesunrise.blogspot.com

    For a more traditional or sleek look, you can go stream-lined and symmetrical.  Hang works from the same series in a grid format for a clean, contemporary arrangement.

    via Timothy Whealon Interiors

    Or, just go loosey-goosey and have fun!  Start with the largest piece, either in actual size or visual weight and work out from there.  Lay your artwork on the floor and play with the configuration until it feels right.

    via Pinterest via blog.apieceapart.com

    Fill the wall as much..

    via Pinterest

    .. or as little as you like!

    via Pinterest via Blissfulblog.com via House Beautiful

    The actual hanging process may seem daunting, but this foolproof method will help you along.  If you need a little assistance coming up with a design, check out these templates for a some inspiration!

    Happy hanging!

    Featured image via The Glitter Guide.

  • Hang ‘Em High..Not TOO High

    Hang ‘Em High..Not TOO High

    CONFESSION TIME:  One of my biggest pet peeves is artwork hung incorrectly.  And by this I mean too high, too low, staggered when there is no reason for staggering ( i.e., up a staircase wall ), etc.   While there are no set rules when it comes to hanging artwork, there are guidelines.  Knowledge is power, ya’ll, and you’ll thank me for it when my eyes aren’t twitching uncontrollably when I come over and see how your artwork is hung.  I’m too polite to say anything, though.. I am a Southern girl, after all.

    Guideline #1:  Normal height for  hanging artwork is to center it at eye level. 

    But whose eye level?  You may be 4’11” but your husband is 6’4″– how do you decide?  Law of averages, my friends.   I’m 5’5″ ( ok, 5’4 1/2″ ), so my eye level is actually spot on.  The safest height at which to hang artwork is 60″ from the center of the artwork to the floor.

    I couldn’t resist adding in this image from Traditional Home ( via House of Turquoise ).  Recognize the work of our very own Pick of the Crop artist, Christina Baker?!  Girl’s got skilz.

    Guideline #2:  Use picture hooks and D-rings for hanging whenever possible

    picture-hooks-ready-for-d-ring-hangers

    Plain ol’ nails might be super cheap, but picture hooks are the best way to go to get your artwork to hang levelly and securely.  The weight of a piece of artwork will drag down a nail, but the picture hooks are designed to set the nail at an angle so that the laws of physics hold the picture up, instead of putting all the weight on the nail.  There are different size hooks available according to the weight of what you’re hanging, so if you’re in doubt about the weight, go with the heaviest weight hook so you’ll be sure your artwork won’t fall on someone’s head.. or toes.

    D-ring hanger

    D-rings are God-sends for hanging artwork and should be used instead of wire, if possible.   Simply install two d-rings at the same horizontal level on the back of the picture frame.  It’s true, you’ll need to put two holes in the wall instead of one, but your artwork will be more secure and won’t have that annoying habit of going crooked anytime it get’s bumped a little or someone closes a door a bit too hard.

    Guideline #3:  When hanging multiple pieces together, be aware of the space between them and how they relate to each other

    If you’re hanging a pair or series of artwork above a piece of furniture, measure and treat the pieces as if you were hanging one solid piece– taking into account a bit of space between them and center the overall size horizontally above the furniture and center each piece vertically at 60″.

    Guideline #4:  Some rules were made to be broken

    Not Guideline #2, the picture hook thing is always important, not just for aesthetics, but for safety.  The other two, however, might be flexible depending on the situation.

    • Broken rule #1– It is OK to hang artwork lower ( or higher, I guess, though this is less common ) than eye level if it helps the work relate to its surroundings

    • Broken rule #2– Sometimes extending a grouping of work outside of the borders of a piece of furniture or other furnishing helps the artwork to make more sense within the room, as in the case of the room below.  In this instance, more is more, yes?

    • Broken rule #3– The rules are, there are no rules.. Sometimes the positioning of artwork doesn’t really need to relate to the surroundings at all.. randomness & asymmetry can be beautiful!  If done well, of course.

    If you ever find yourself unsure of how to hang your latest acquisition, I hope these guidelines are helpful.  If you’re really stuck, drop me a line– I’m happy to help!  Happy hanging!