By now, we’ve all seen the gagillions of pins of perfectly arranged art walls, so we know full well that when grouped with other work, small art pieces can sing. But when grouped with all those other works, lilliputian work can sometimes be as overlooked as a backup singer. Hang them on a wall all by their lonesome, though? You’re giving them the mic and letting them shine!
Here are a few of my favorite rooms showcasing small art works–
Need more convincing that small art can have major effect? Head over to Mantle Art & check out the beautiful, super affordable Artsy Forager Collection of limited edition prints. They’re small but they’re fabulous!
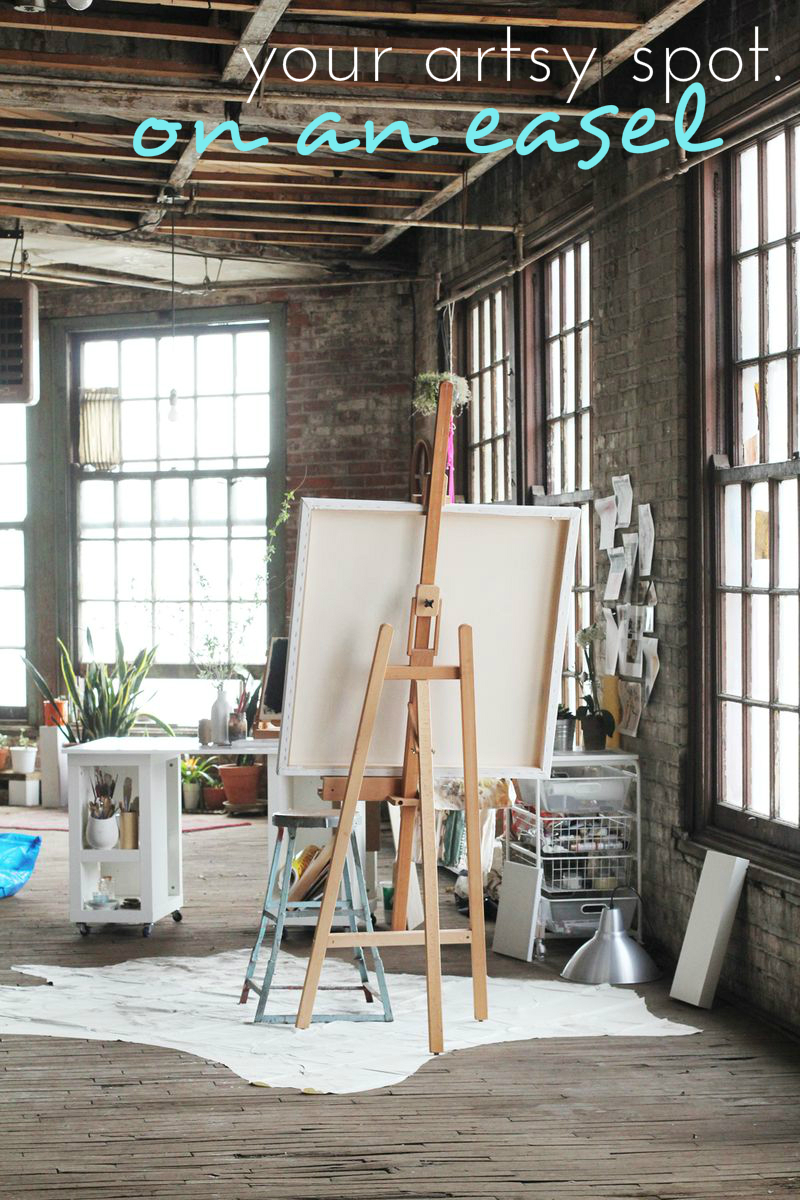
Touring artist studios at last weekend’s ArtsAlive got me day dreaming about my own future work space. As we travel, I paint either at our dining/kitchen table or on a collapsible easel Mr. F bought me a few years ago. I can’t wait for the weather to get warmer so I work out on our pretty little deck! Where do you like to set up your artistic command center?
If you work small like I do currently, or on paper, maybe a table works for you. A big flat surface where you can spread out and everything you need is within reach. And bonus– you get to sit down!
Or maybe you’re a traditionalist and working from an easel is your thing. A good sturdy, adjustable easel is a thing of beauty. There is one in the window of the local art supply store that I am totally coveting.
Perhaps you like working a la Jackson Pollock? It might be hard on the back, but working on the floor is great for large canvases or getting a different perspective on your work. And I’m pretty sure it’s a great workout.
A lot of artists like to mount their canvases on the wall and if we ever have the extra space, I would love to give this way of working a try. Would be especially fun in a studio in which you were free to make as big a mess as you wanted!
A lot of artists don’t have the luxury of a dedicated studio space, so we just find a place to land our artsiness wherever we can! Maybe it’s the kitchen island or a corner in the attic. If you’re an artist, wherever you happen to be, that’s your artsy spot.
Mr. F and I may not have any babies, but that doesn’t keep me from ooing and awing over fantastically artsy nursery designs. So when my friend and fellow art obsessive Kaitlyn, over at isavirtue shared pictures of the art filled nursery which will soon welcome her new little bundle of joy, I just had to share them with you!
I love the zap of color, texture and gosh-darn-happy this painting by Freyja Zazu hits you with. I’m willing to bet that baby Patience will love to stare at it when he gets a little older and plays that age old game of let-me-turn-the-light-switch-on-and-off.
In the rest of the light filled space, Kaitlyn and her hubby have chosen to hang work that is meaningful and playful, perfect for an artsy baby.
Over the crib hangs a series of original illustrations by the artist for whom Kaitlyn works, Ted Harrison. The works were created as illustrations for a children’s book about Harrison’s dog titled Maggie’s Magic Dream. Perfect for a peaceful sleeping baby, kind of a visual lullaby.
On the wall above the ( awesome ) rocker, is a vintage print salvaged by K’s hubby from his parents’ garage. Six sweet vignettes capture the bedtime routine of a daddy bear and baby bear. ( collective awwwww! )
Above the dresser/changing table, which by the way, is such a smart use of resources, is a lovely little art wall filled with a collection of quotes and woodland themed prints from affordable sources like Etsy and BigCartel. That little fox is grabbing my heart and so is the story of the inspiration behind the doe and fawn drawing.
I mean, if this isn’t the sweetest little nursery ever, then I’m a monkey’s uncle. See more images from Kaitlyn’s art filled nursery and find out more about the design on the isavirtue blog.
PS– Congrats to Kaitlyn & hubby Jon as they welcomed baby boy Jackson on March 22nd!
There’s this thought that’s been dominating the art and interiors world for a while now– the white cube phenomenon– the thought that art is shown at its best on a clean white wall. And perhaps sometimes that’s true, but when you live with art, it becomes a part of your surroundings in a much more subtle and incorporated way. Layering your art on patterned walls can create a complex visual even more intriguing to the eye!
Here’s four ways to display art on patterned walls–
1 | soft texture So maybe you’re more into super subtle patterns, letting a softly textured pattern play a secondary role in a solid, rich color, allowing monochromatic artwork takes center stage. Just an understated wash of color and visual texture plays up the nuances in the artwork.
2 | playful repeats Play up an element in your artwork by subtly repeating it in your wall covering. The nautilus shell-like pattern below is a quiet nod to the lollipop swirl in the painting. It’s not in-your-face-repetition, but once you start looking, you’ll see repeating patterns everywhere!
3 | modern botanics This isn’t your grandma’s family portrait on floral wallpaper. The monochromatic scheme of the paper keeps it feeling fresh and modern and subtly picks up on the greens in these contemporary portraits without being matchy-matchy. Plus it’s like being in a sunny garden! Bonus.
4 | graphic goodness Big bold, graphic artwork is too much for all this pattern, right? Wrong! The symmetrical and relatively small pattern repeat on the wall covering is the perfect foil for the freeform overlapping squares in this piece. Keep the scale of pattern in your artwork complementary and you’ll be sure to please the eye.
Once upon a time, wood paneling was the epitome of dated and dreary. Think back to that 70s basement.. yikes! But wooden wall treatments are seeing a resurgence lately and they are coming back stronger and more artful than ever! You may love the look of these modern paneling interpretations, but not sure how to incorporate art on wood walls? There are as many ways to style a wood paneled room as their are trees in the forest. Since painting over wood gives you basically the same canvas as a painted wall and I like a challenge, we’re going to focus on art on wood walls with a more natural finish/stain.
Here are just a few ways you can go–
1 | beachy keen, jelly bean. Lightly stained or pickled wood lends the perfect bleached out style to a coastal setting. If your taste in art tends toward a pastel palette, keep the softness and natural calm going. Pieces like these by Leora Armstrong with a strong horizontal vibe recall that perfect spot where the sky meets the sea.
2 | mid-century glam it up. Love Mad Men? Live for Saturday afternoons spent combing vintage shops and thrift stores for Mid-Century treasures? Secretly want to wear a pencil skirt and heels while serving cocktails? Large cut wood panels in a uniform stain are the ideal backdrop for some MCM goodness. Abstract artwork in earthy tones complete a room Don Draper would be proud of.
3 | cozy up to modern warmth. Sometimes the elements we love about modern spaces, like concrete floors and soaring ceilings, can lead to a less than inviting atmosphere. But juxtapose warmly stained wood walls against those details and it’s like cozying up to a warm fire. Artwork with lots of texture as well as pops of color and pattern add to the warming effect.
4 | elevate to rustic elegance. Pickled wood walls can be taken in so many directions. Their greyed-out tone makes them ultra versatile. In Jackie Aster’s NYC apartment, as featured in Elle Decor, the wood walls add just a hint of neutral texture and ground the formal finishes with just the right amount of rusticity. A Damien Hirst etching adds a bit of playfulness turning what could have been an uptight room into space filled with snuggly joie de vivre.
Do you live with art on wood walls? How is it working for you? Or maybe this inspired you to embrace that wood paneling you used to hate! Work with the grain, not against it. 😉
All images are linked above. Want to see more in the Artsy Dwelling series? Check out the archives here.
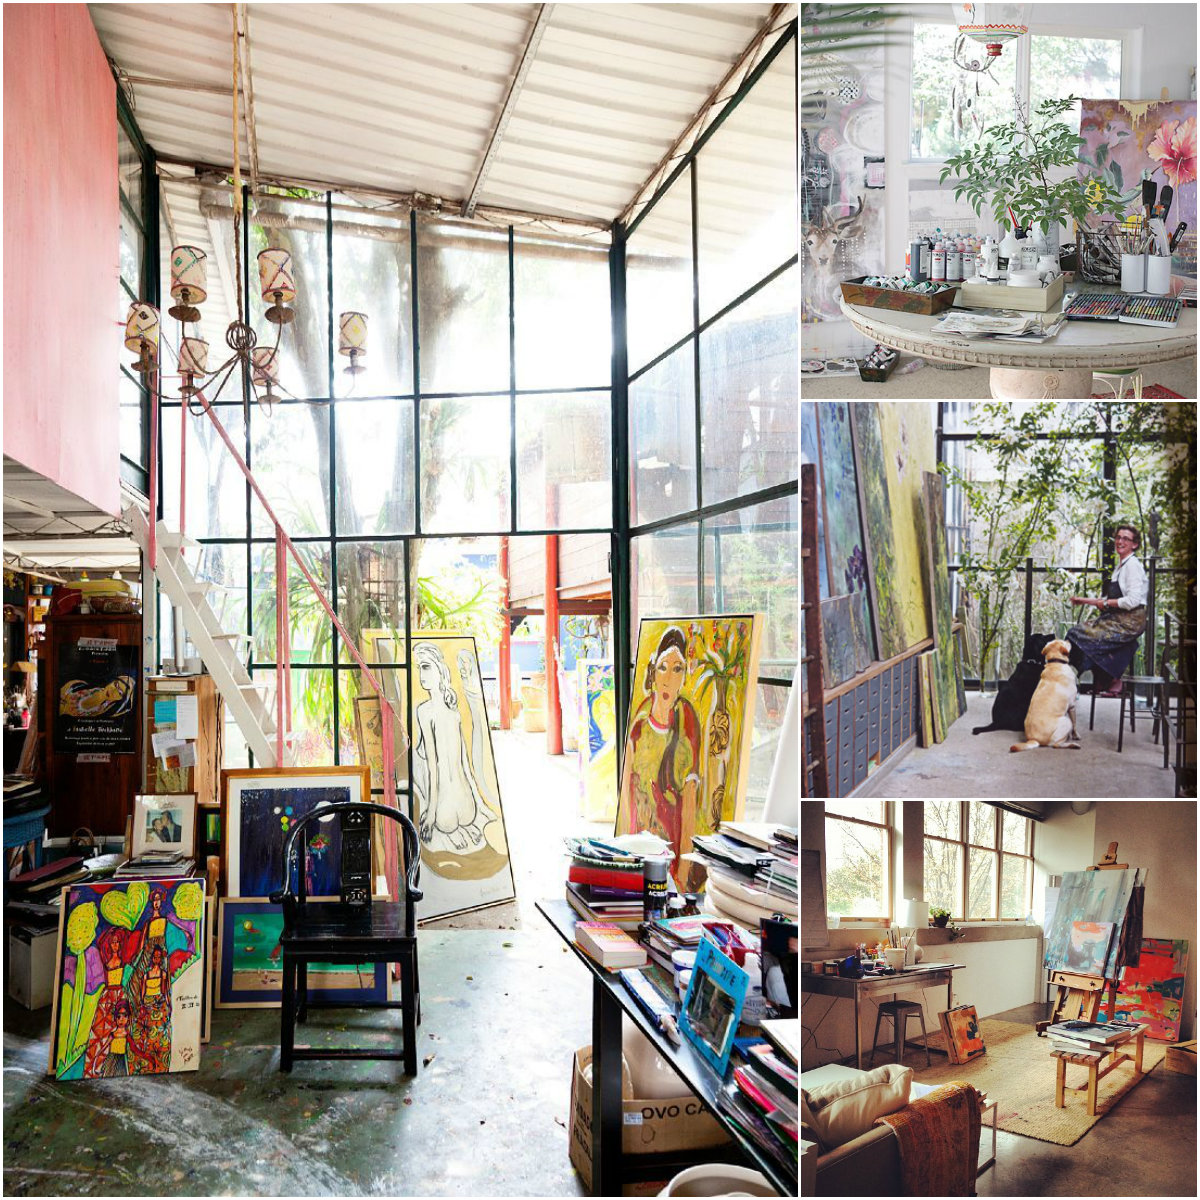
As different as each artist’s work can be, so too is the way they work and the environment in which they find the most creativity. Some artists are lucky enough to be able to design their studio space to fit the way they work just perfectly, others take advantage of whatever available space may be at hand. And some, like me, out of necessity keep their supplies to a minimum so they can set up studio wherever they land! But oh how I long for the day when I can have a dedicated work space. Are you dreaming of your own studio space, too? What’s your current art studio style? What are you dreaming it could be?
found here
Do you like your space open & airy? Maybe like Willem de Kooning, you create best in bright white spaces with soaring ceilings and gorgeous light.
Don’t have a big open space? Paint every surface of your small studio white and remove any window treatments. You’ll be amazed at how much light bounces around the room!
Some artists work best in smaller, creative & cozy spaces. Filled with warmth and life, Monet-like spaces make you want to settle in with a cup of tea and paint your heart out.
Paned windows, chandeliers and plants make a studio space feel like a creative home. And having a sweet pup around to love on helps with the creative frustration!
No doubt working in a neatly organized space helped O’Keeffe achieve her soft, elegantly clean lined paintings. A tidily laid out space with supplies within arm’s reach allow an artist to concentrate on creating instead of looking everywhere for that one tube of paint..
Timothy Atwood said, Creative mess equals creative thought. And for many artists, I think this holds true. Most creatives are, by nature collectors. We need to be surrounded by a beautiful mess, so that inspiration may spark at any time. And let’s admit, sometimes, we’re just too busy creating to pick up. 😉
Once upon a time, there was a rule that we all followed diligently– that art had to be centered on something. Whether it was centered above a piece of furniture or centered based on the wall on which it was hung, centering was very important. But I’m noticing a trend towards more casual, more interesting placement. Deliberately hanging artwork off-center. Justified waaaay to the right or way to the left.
Bold statement pieces often need another dramatic something to balance them out or your room may feel a bit lopsided. That scene stealing coffee table or pendant needs something to create a bit of harmonious tension, otherwise, he’s like that dinner party guest that just won’t shut up. We liked hearing his stories at first, but someone else, please say something!
Our eyes like triangles. Triangular compositions help our eyes travel and take in all that we see instead of zeroing in on one element. By hanging artwork off center, you can deliberately create your own triangular composition. So even if that painting is hanging in a place that at first seems off, once your eye takes in all the other elements in the room, it seems just right.
3 | Work your other angles
Angles aren’t just found in the architecture and furnishings surrounding a piece of art, but also in the artwork itself. Don’t forget about the compositional lines and angles in your artwork when thinking about how to hang it. The work should carry on a pleasing conversation with the furnishings around it. Like a first date that’s going really really well.
Hanging artwork off center doesn’t necessarily have to mean that the artwork isn’t centered on anything. Just maybe think about centering on an unexpected or secondary element in the room, like a chandelier or rug instead of the desk or dining table.
Rules tend to be created to make things easy and orderly. But art is neither of those things, so why should we live with it that way? Don’t be afraid to be a bit off center. Your art is crying out for it!
See more off centered artsiness in my Artsy Dwelling Pinterest board! Need some help finding just the right artwork for your space? I can help with that! More info here.
You know, there’s more than one way to skin a ca— I mean, hang artwork. I hope I proved that in our last foray into Artsy Dwelling! Be a rebel. Don’t hang that art at all! Go all crazy and casz.. just let it lean.
Leaning = layering. If you keep your artwork relegated to the walls, you’re holding it at a distance. You know, like that moldy fruit you found in the refrigerator. But living with art should be about living with it, having it truly be a part of the way we interact in our personal space. Leaning brings it in close. We can study it, pick it up and touch it, live with it in ways we can’t do when it’s nailed to a wall.
Check out some of my favorite ways to style leaning artwork–
Take advantage of those architectural details as a natural resting spot for artwork. It’s kind of Decorating 101 to put artwork above a fireplace, but leaning it on the mantle, especially when layered with other pieces creates a visually rich display that’s easy to change up with the seasons or just on a whim!
Same rules apply for furniture. Wait, forget that. There are no rules! Big art, small art, doesn’t matter, as long as it makes an interesting impact and puts a smile on your face. It all goes back to that layering thing. Leaning artwork connects itself better to the other objects in your vignette when it is sitting on the same surface. It’s like bringing your artwork into the half-time huddle. Now he feels included!
PS– If you’re gonna lean artwork on your headboard, might be a good idea to secure the back with a little 3M velcro, you know just in case things get a little, shall we say frisky? Oh come on, you know you were thinking it!
My favorite rule to break. Used to be, no art lover would dream of putting artwork, which let’s face it, we probably paid a lot of money for, even partly hidden behind a piece of furniture. But that little artsy game of peek-a-boo leaves me wanting more!
Maybe you have the perfect spot for a piece of artwork, but hanging just isn’t practical. Just lean that baby on the floor. The perfect solution especially for super oversized pieces of work that it would take an army to hang! Or for when we want a splash of color but don’t want to commit to holes in the wall.
Of course, it should be noted that leaning artwork, especially on the floor and behind furniture isn’t the idea solution if you have small children, rowdy teenagers ( ok, really any kids at all ) or clumsy husbands. 😉 Do you have any artwork leaning around your house? Share a photo over on the Artsy Forager Facebook page, I’d love to see!
Look beyond the nail and picture hanger. There are so many unique ways to hang artwork, whether you’re hanging just one piece or grouping lots of work together. Here are a few of my favorite methods!
Create a bit of interest and drama by hanging your artwork by a thread, ‘er string. It’s a great way to add a bit more height to a piece that isn’t quite tall enough for your wall or to add just the right boho vibe.
Clip art takes on a whole new meaning! Use specialty art clips, gator clips, vintage pant hangers or even just an old fashioned clipboard to display work that isn’t terribly precious. ( Stay away from clips that might crimp for artwork you don’t want to damage ).
Artwork stands out– literally– when you hang it from a three dimensional grid. The grids add just the right amount of visual texture, creating an interesting juxtaposition and the added bonus of easily switched out work.
Maybe you’re lucky enough to have some fabulous architectural details already built into your home! Consider using those structures as a hanging surface for art– that’s what those vintage picture rails were for to begin with! I’m personally in love with the industrial vibe of the barn-door hanging above!
Perhaps the most fun of all the options– create an art mobile! These tiny clips are perfect for displaying artful photos, sketches, postcards, etc. You know when you’ve bought a little notecard of an artist’s work, knowing there’s no way on earth you could ever afford an original? Here’s the perfect way to display those treasures!
The ol’ thumbtack method was probably the very first way anyone hung your artwork. Or maybe your mom used refrigerator magnets instead. Raw, unstretched canvas pinned up in the corners with brass tacks looks absolutely divine in this nursery, doesn’t it?
Have a unique art hanging method you’d like to share? Let us know in the comments below!
Gallery walls have been all the rage for a couple of years now. They are a fantastic way to showcase your art collection and so easy to change up! But sometimes, you want your art wall to make a bolder statement– why not make the wall itself the artsy focal point? Whether you paint your masterpiece directly on the wall’s surface, apply an artsy wallpaper, or a mural sized decal, there will be no shortage of artsiness on those walls! Here are just a few of my own faves from around the web–
Think I love the simplicity of the pink geometric design and the blue watercolor best. What do you think? Have you ever treated your walls as a truly blank canvas?
PS– Need help finding art for your walls? Check out the new services I’m offering! Click on Forager For Hire in the tool bar for more info!